Installing Sapper, Part 1
There are a LOT of posts on the web about how to install Sapper from the Svelte Github. When I was getting started I used a combination of Sapper's Github README.md along with several of the posts you can find by Googling "install sapper."
As a complete Svelte and Sapper newbie, I found many of the Sapper posts helpful but missing details and comments about HOW and WHY to modify and use a Sapper install beyond the Starter Project Template.
So I decided to build what would have been helpful to me.
PLEASE NOTE: You need some basic understanding of how to use not only the Terminal, but also how to hand code HTML, CSS, JavaScript, and other web technologies. If you don't, setting up and deploying a Sapper site is probably beyond your current capabilities.
Baseline assumptions:
- I assume you know how to use the Terminal on a Mac. If not, Google "use terminal on mac".
- I assume you have Homebrew installed and know how to use it.
- I assume you have NPM installed via Homebrew so you can install the packages.
- I assume you have git installed and have a working understanding of version control.
- I assume you have a Github account and know how to use it.
So let's get started...
Step 1 - Copy the Sapper Template
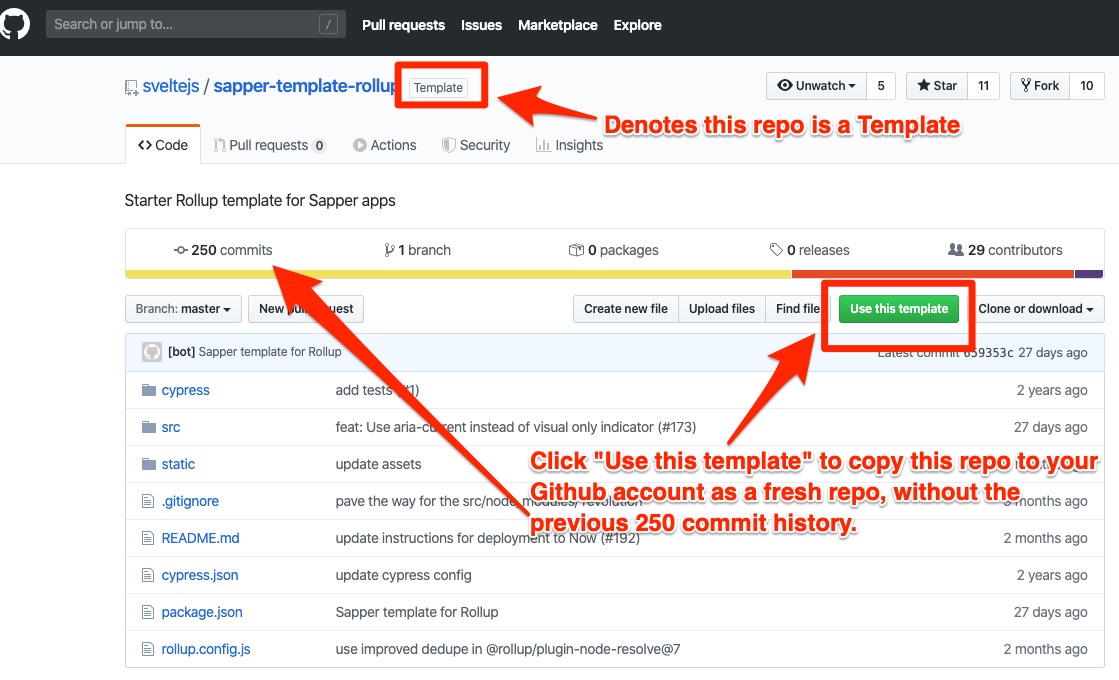
Make sure you're logged in to Github and then hit either the Sapper Rollup or Sapper Webpack templates. I use Rollup because the creator of Svelte and Sapper is also the creator of Rollup.
We're going to use the "Template" instead of the regular Sapper Starter Project because the Template starts you out with a fresh repo...without all the previous commits.
Click the green "Use this template" to add this repo to your account.
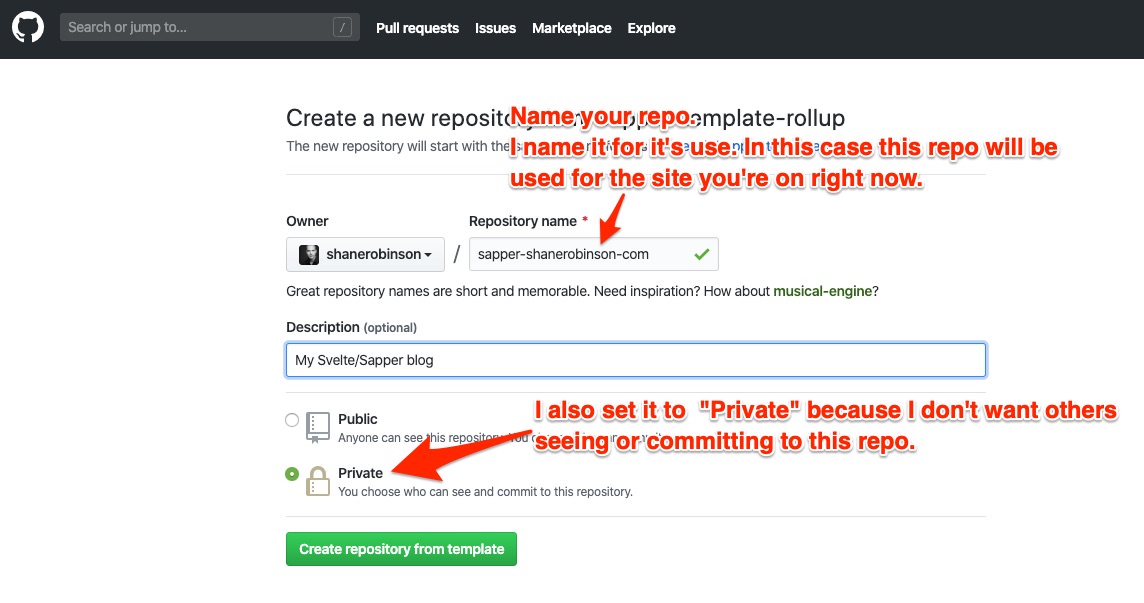
Step 2 - Name Your Repo
Now you will be asked to name your new repo. You'll see in the screenshot below I named my repo the same as this website. It's a naming convention that I use to help keep repos and codebases organized on both my Github and my local dev environment.
I also set this repo to Private because I don't want it shared with the world as it is this actual website.
Click the green "Create repository from template" button to continue.
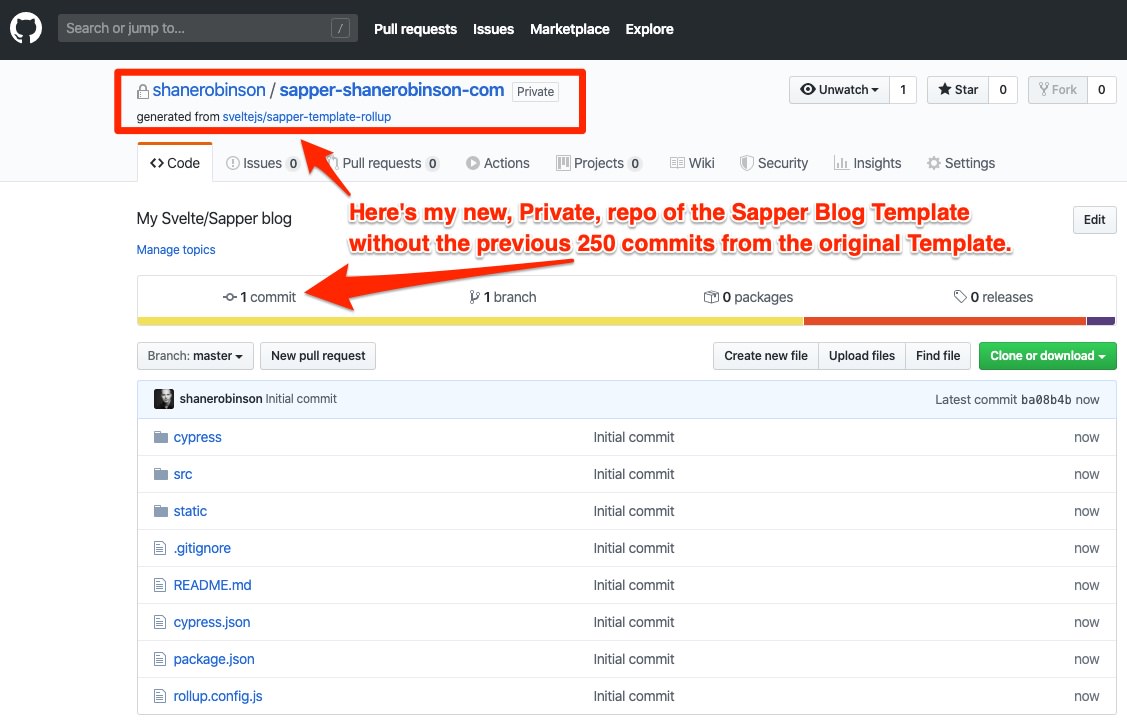
Step 3 - Your New Repo
You now have a new repo, copied from the original, but without all the original commits from the copied repo.
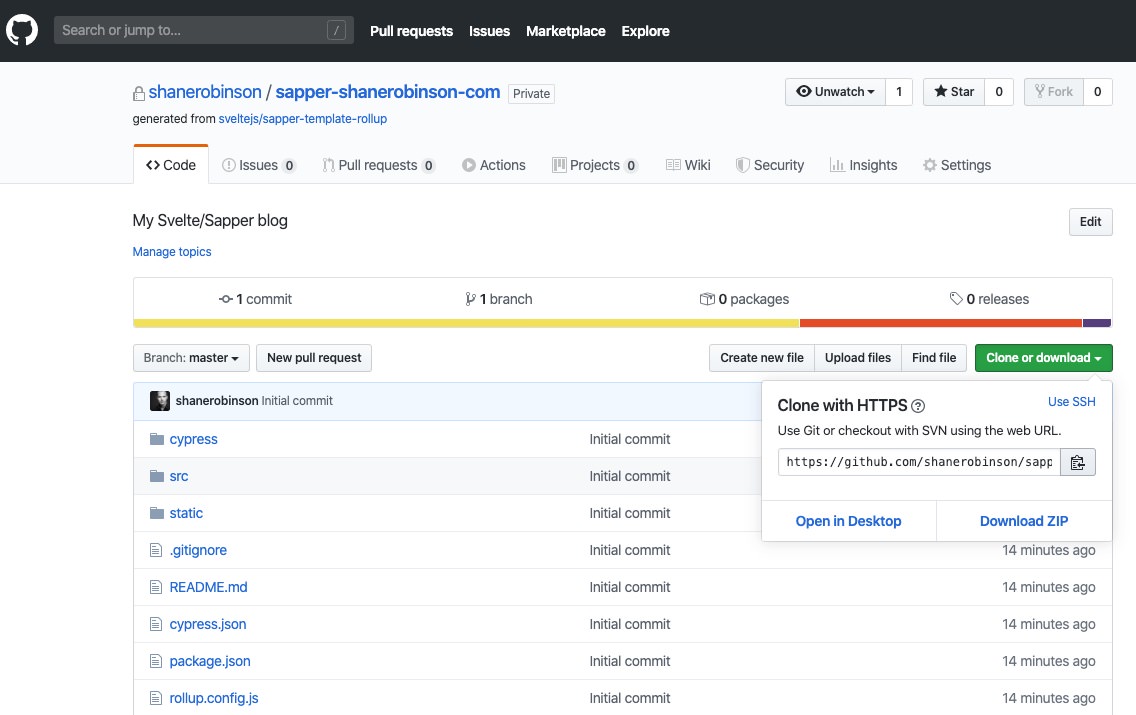
Step 4 - Clone to Your Computer
Now you can clone your new repo to your local computer.
- Click the green "Clone or download" button
- Then click the little clipboard button to copy the repo URL.
- On your computer, launch your terminal and navigate to wherever you keep your development code/sites.
- In the directory where you want the new Sapper repo, use git to clone the repo:
git clone [URL]where "[URL]" you paste the URL you copied in step 2. - Git will copy the repo from your Github account into a new directory with the same name as your repo.
- If you want to use a different name for the local directory, just append it to your git clone command:
git clone [URL] [DIRECTORY_NAME]
- Now
cdinto your new directory.
Step 5 - NPM Install
Still in the terminal, and making sure that you're in the newly created repo directory, you're now going to type npm install to install all the modules specified in the "package.json" file.
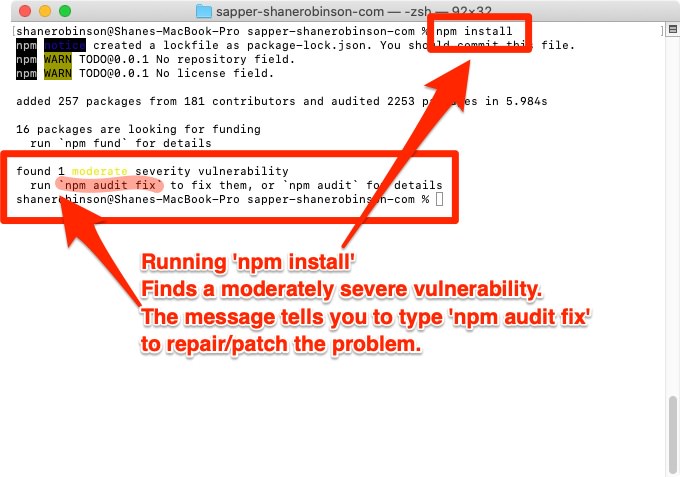
As of writing this post, March 29, 2020, there is a moderately severe vulnerability in one of the packages. The install command tells you to run npm audit fix to see if it can patch the vulnerability.
Step 6 - Audit Fix (if needed)
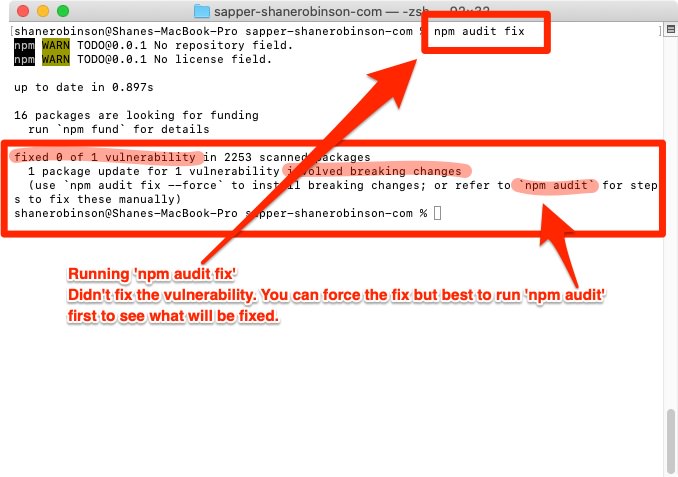
Running npm audit fix did NOT fix the vulnerability. You can run npm audit fix --force to install the update...but it's possible the fix could break other things. Best to run npm audit first to get a report on what the fix is.
Step 7 - Audit Report
Running npm audit provides detailed information on what the vulnerability is and how to fix it.
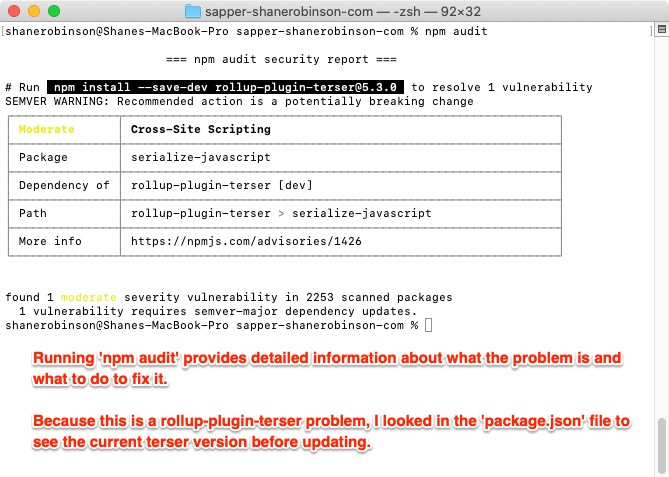
Because the vulnerability is in the "rollup-plugin-terser" module, I checked the package.json file to see the current version before forcing the update.
Step 8 - Package.json File
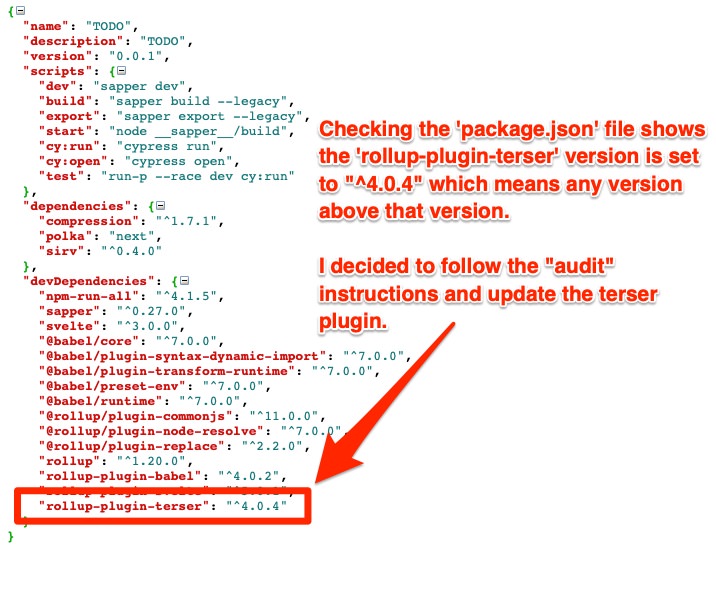
Package.json shows the current version is set to "^4.0.4" which means to use any version higher than that.
Step 9 - Update Terser Plugin (if needed)
I decided to force the udpate by specifying exactly the plugin version to update to:npm install --save-dev [email protected]
After the update, it automatically checks for any vulnerabilities and we get a clean report.

Step 10 - Success!
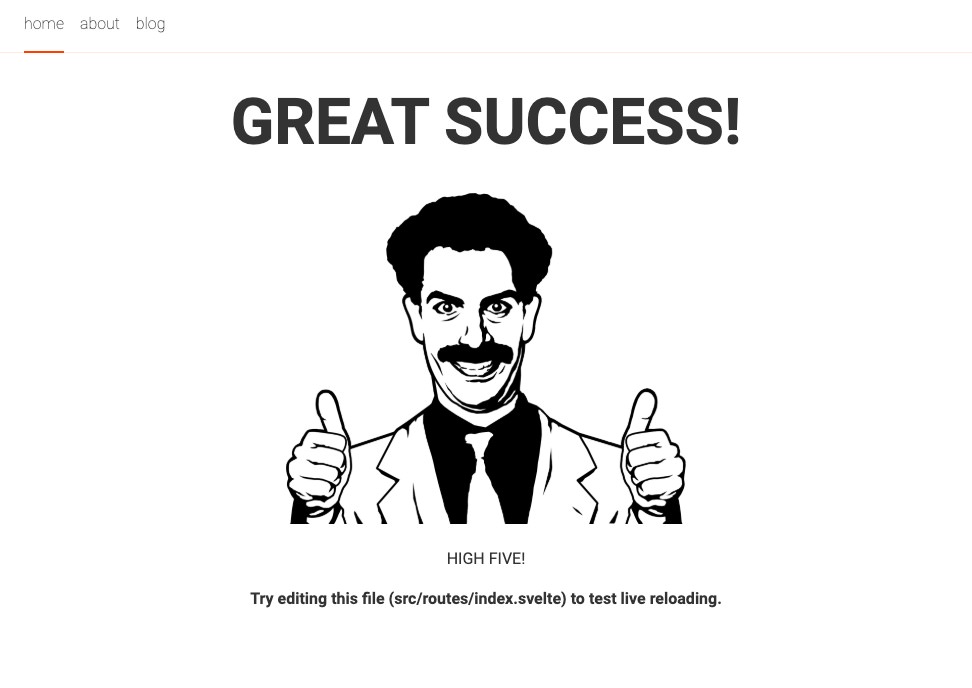
Now just enter npm run dev and hit Return. If all is well, you'll see a message "Listening on http://localhost:3000".
Fire up your browser, I recommend Brave, and enter localhost:3000 to see your new Sapper site.
Click around to see the pages change instantly!
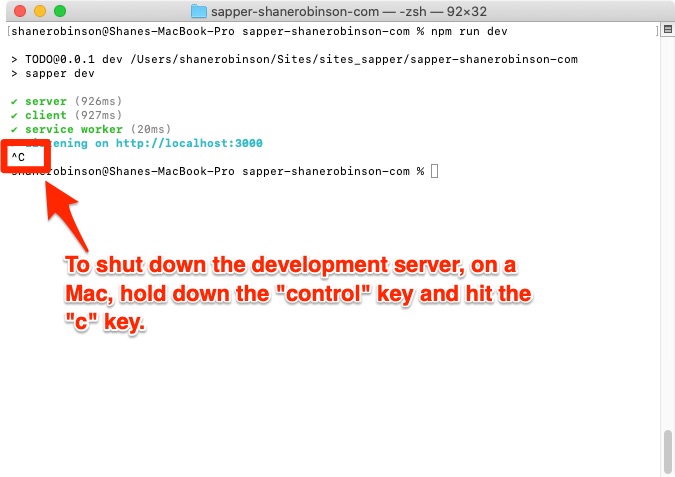
Step 11 - Shutdown DEV Server
When you're ready to shut down the dev server, just hit Control + C on your keyboard.
Congratulations!!
You have a fully operational Svelte-powered Sapper website running on your local machine.
If you're ready to setup free, public, secure, custom domain hosting on Netlify, follow the next steps...
There's still a LOT to do. But for now, you can do the following until I get the next post up:
- Read up on both the Svelte docs and Sapper docs.
- Poke around the /src/routes/index.svelte and /src/routes/about.svelte files, and files in /src/routes/blog/ to get a sense of how Sapper routing works and how you'll be writing and coding your new site/blog.
- Check out the Roadmap to see what I'm currently working on for this site.
- Subscribe to my new email newsletter below (if you haven't already) and I'll email you every time I post updates to this site.